
Steps to the Complete Oral Exam and Charting
A key element of the Comprehensive Oral and Radiographic Evaluation (CORE).
By Denise Rollings, AAS, CVT, VTS (Dentistry), Key Account Manager, iM3 | 2026
The complete oral exam should be performed in a systematic manner with the patient under general anesthesia. It is recommended that an oral exam under anesthesia should be performed on an annual basis for all patients and annual cleanings are usually performed at the same time.
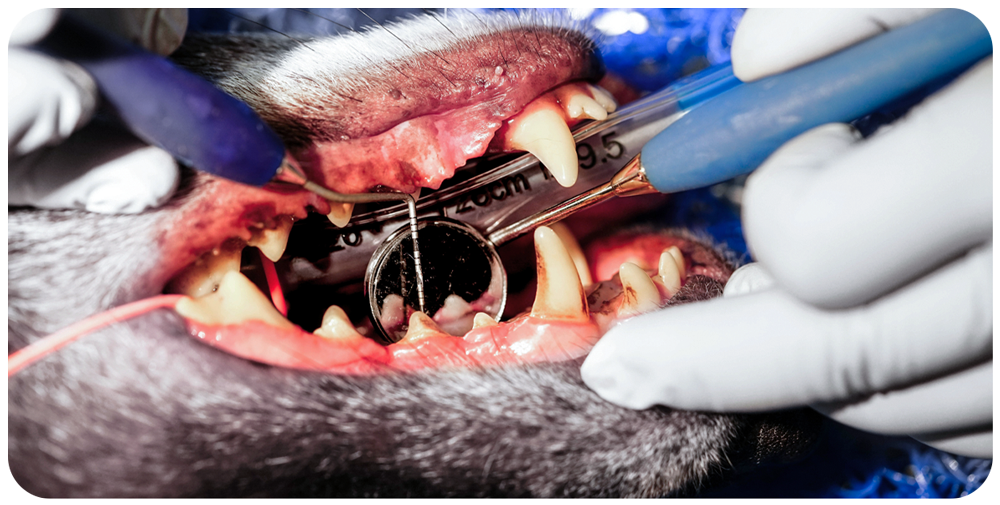
When communicating with pet owners about the importance of having teeth cleaned, the oral exam should be emphasized as well. Our goal is to find pathology, treat what needs to be treated, and prevent disease. We need to shift our emphasis from cleaning the teeth when they look dirty or extracting teeth when they are falling out, to prevent disease from getting that bad in the first place. The oral exam is as or more important than the cleaning.
" There should be a qualified technician monitoring anesthesia and a qualified technician performing the dental procedure."
There should be a qualified technician monitoring anesthesia and a qualified technician performing the dental procedure. It is not safe for one technician to be do both. Neither job can be performed correctly or safely if one person is doing both.
Step 1: Pre-intubation Exam
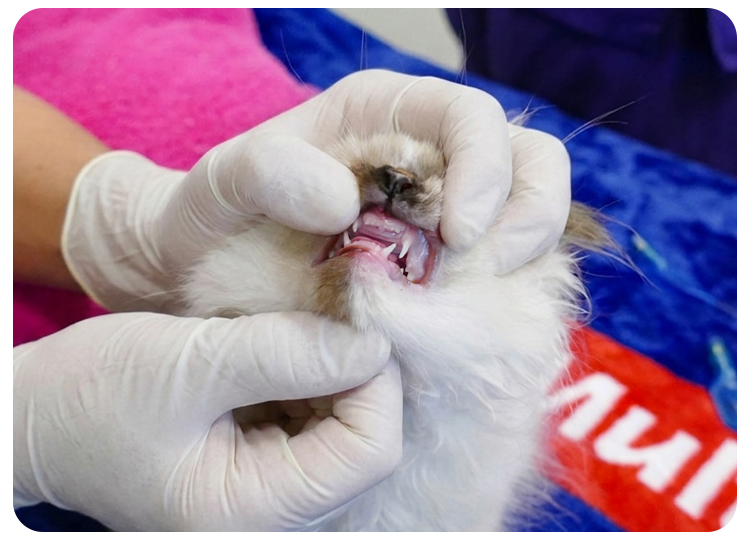
Start with a pre-intubation exam. Check the occlusion of the patient before intubation. Once the patient is intubated, the endotracheal tube will prevent the mouth from closing.
Class 2 and 3 malocclusions, crossbites, and asymmetries are best noted prior to intubation.Take photographs of the occlusion so there’s reference to look at if attrition or soft tissue traumas are found on the complete oral exam.
Step 2: The Four-Handed Dentistry & Legal Charting Setup
Once the patient has been anesthetized, the oral exam and charting can begin. Using four handed dentistry, the doctor performs a complete oral exam using the probe/explorer and the technician documents the findings.
A technician educated in veterinary dentistry can be trained to perform a complete oral exam; however, a veterinarian must diagnose pathology and check the findings.
A dental chart is legal, medical documentation and is part of the legal medical record for that patient. It must provide enough information to justify the treatment performed.
The important information to include on the dental chart are:
- patient signalment
- chief complaint
- dental anatomic chart to include previously performed dental work
- current pathology
- treatments performed
- a table to record probing measurements for each tooth
- a key for abbreviations used
- additional exam findings
- comments section
- imaging (dental radiographs +/- CBCT) findings
- recommended follow-ups
- home care recommendations
A small sticker of a mouth does not allow for this level of detailed documentation.

Step 3: Extraoral & Non-Dental Soft Tissue Assessment
After the pet is under anesthesia, obtain photographs before you begin the oral exam or cleaning. A complete oral exam begins with observation and palpation of the cervical and facial region looking for asymmetries, swellings, draining tracts, painful areas, and mandibular lymph node enlargement.
Check all surfaces of the teeth and note calculus and plaque indices, and document missing teeth and supernumerary teeth. Examine the non-dental oral tissues including the buccal mucosa, tongue, hard and soft palate, and tonsils for any abnormalities including granulomas, chewing lesions, lacerations, ulcerations, foreign bodies, or oral masses.
Document the occlusion of individual teeth including crowded or rotated teeth. Note the severity of gingivitis.
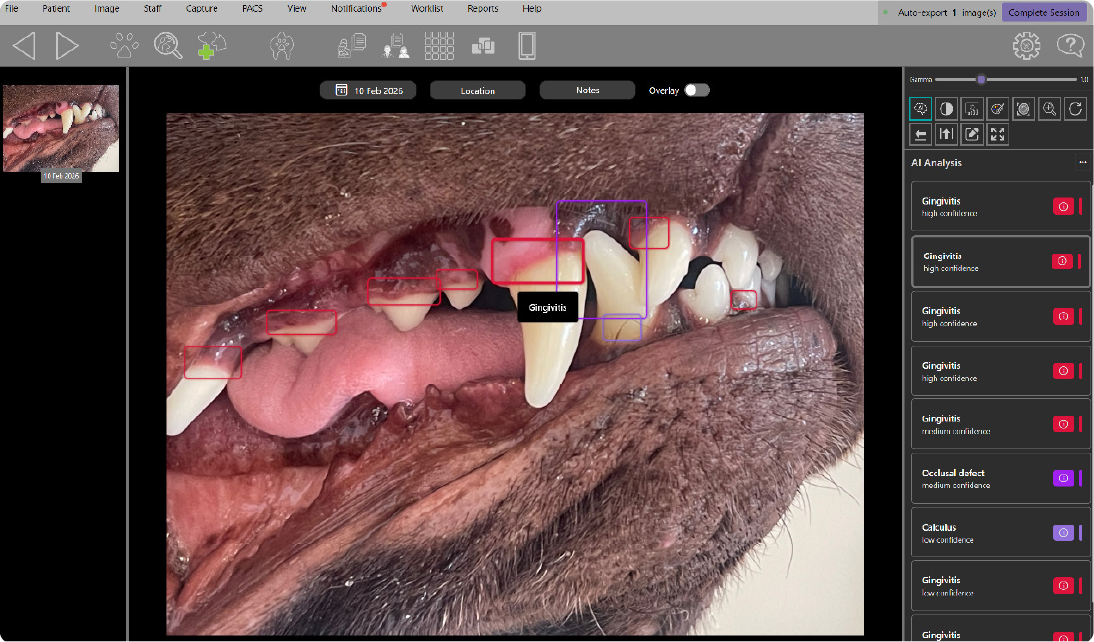
iM3 Clarity XR Software identifying potential abnormalities and areas of concern from intraoral photographs before the dental procedure using AI-assisted analysis.
Step 4: Periodontal Probing & Identifying True Attachment Loss
Probe every single tooth. Walk the probe around the entire tooth and measure pocket depth, gingival enlargement, bleeding, gingival recession, furcation exposure and tooth mobility.
A periodontal probe is essential for proper assessment of periodontium. There are different types of periodontal probes, so be sure you know the type you are using.
The normal sulcus is between the tooth and free gingiva and the normal sulcus depth in a dog is less than 3 mm and less than 0.5 - 1 mm in a cat. The periodontal probe is walked around every single tooth at four to eight sites.
DEPTH IN DOGS <3mm
DEPTH IN CATS <1mm
Technique Tip: One must not use too much pressure and accidentally create a pocket. Use gentle pressure.
Normal gingiva is pink and/or pigmented based on breed or that patient. Signs of gingivitis or periodontal disease are red, swollen gingiva that bleeds easily. Increased probing depths can be caused by attachment loss, gingival enlargements, incompletely erupted teeth.
Gingival enlargements and overgrowth can cause pseudo pockets. There isn’t attachment loss, but there is a probing depth. One must be able to determine true attachment loss by adding the probing depth and gingival recession and subtracting the probing depth and gingival enlargement.
Step 5: Classifying Pathology (PD, Furcation, & Mobility)
1. Periodontal Disease Staging (PD 0-4)
To properly stage periodontal disease, one must perform a comprehensive oral exam. The oral exam will determine if there is attachment loss, and intra oral dental radiographs are used to help determine the percentage of attachment loss that is present.
Periodontal disease (PD) is staged by severity:
- Stage 0 PD has no gingivitis.
- Stage 1 PD is only gingivitis. Gingivitis is inflammation of gingiva, without attachment loss.
- Stage 2 PD is gingivitis with less than 25% attachment loss.
- Stage 3 PD is gingivitis with 25% to 50% attachment loss.
- Stage 4 PD is gingivitis with greater than 50% attachment loss.
Periodontal disease stages can be for the generalized stage or a focal stage.

2. Furcation Exposure (F1-F3)
A furcation is the area between the roots of a multirooted tooth. Furcation exposure is documented F1-F3.
- Furcation 1(F1): Periodontal probe goes less than halfway between the roots.
- Furcation 2(F2) Periodontal Probe extends halfway or more but not all the way through.
- Furcation 3(F3) Periodontal Probe extends all the way through the roots.
3. Tooth Mobility (M0-M3)
Mobility is also measured and documented.
- Stage 0 mobility(M0): Normal mobility of the teeth up to 0.2mm.
- Stage 1 mobility(M1): measures from 0.2mm to 0.5mm.
- Stage 2 mobility(M2): measures 0.5mm to 1.0mm.
- Stage 3 mobility(M3): measures greater than 1.0mm.
Step 6: Antisepsis & Tactile Exploration
A pointed tip explorer is used to identify tooth resorption, carious lesions, pulp or dentin exposure, and subgingival calculus.
Safety Tip: The explorer is placed on the tooth and not used to probe down into the sulcus as damage may occur.
Rinse the oral cavity with 0.12% chlorhexidine solution if available. This reduces the number of bacteria that both the staff and patient are exposed to during the procedure. You can leave it on for a few minutes or even brush the teeth with the solution before starting.
